J Cut And L Cut Audio Smoothing For Talking Head Jump Cuts
Smooth talking-head jump cuts with J cuts, L cuts, 2–6-frame audio fades, room tone, and retention QC in Premiere Pro and DaVinci Resolve for YouTube.
With talking-head jump cuts, the audio typically gives out before the image does. Viewers notice a truncated breath, sudden shift in noise floor, or dropped consonant and instantly sense an edit.
With a J cut, the audio from the upcoming shot arrives earlier than its video. With an L cut, audio from the departing shot carries forward after the video has changed. When cutting same-camera talking head, keep both techniques restrained: lead with a tidy breath or stretch of room tone instead of laying the next sentence across the previous expression. What you want is dialogue that feels unbroken right through the edit.
What are the verified benchmarks for J cut and L cut audio smoothing for talking head jump cuts?
Those verified figures cover source media, retention, chapters, and review workflows; you still need to set frame offsets by listening.
| Benchmark | Verified figure | Practical editing decision |
|---|---|---|
| Raw talking-head cleanup | Raw unscripted recordings average 15% to 22% Creator Timeline Audit & Wistia Production Data, 2025 dead air, breath pauses, and false starts before assembly. | Budget for dialogue cleanup before adding B-roll or captions. |
| Mid-length retention | Educational videos holding 50%+ average percentage viewed and 70%+ 30-second intro retention vidIQ & YouTube Creator Retention Study, 2025 outperform channel baselines in browse impressions. | Audit split edits around the cold open, but do not attribute retention changes to audio smoothing alone. |
| YouTube chapters | Chapters require at least 3 timestamps beginning at 00:00, and each chapter must last at least 10 seconds Google YouTube Help Documentation, 2025. | Recheck chapter boundaries after tightening pauses changes the runtime. |
| Client review | Timecode-pinned review links produce a median of 2.4 revision rounds versus 4+ rounds through unthreaded email Frame.io Workflow Study, 2025. | Pin audible-edit notes to exact timecodes instead of requesting general polishing. |
As a craft starting point, try a 4-to-12-frame picture/audio offset paired with a 2-to-6-frame audio crossfade, then tune by ear. Consider those values initial references for auditioning. Brief fades work well when room tone stays clean and steady, while extended fades risk phasing or duplicated breath sounds.
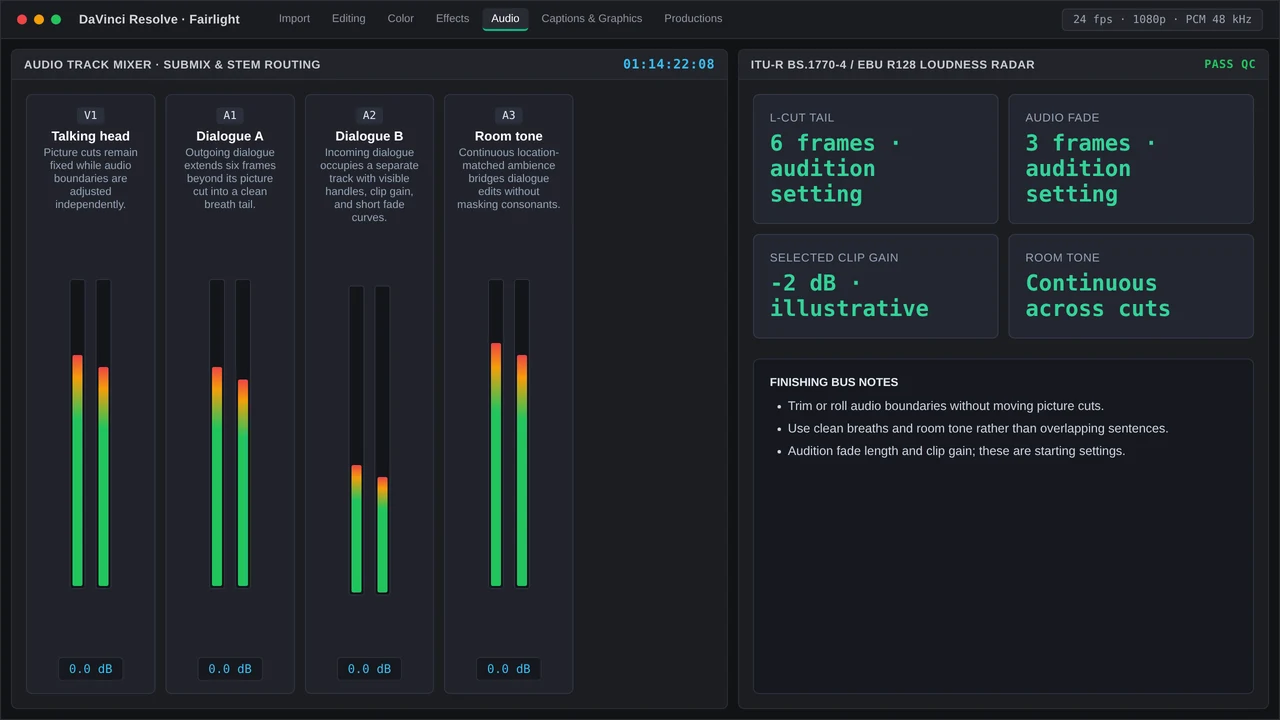
Step-by-step Premiere Pro and DaVinci Resolve setup for J cut and L cut audio smoothing for talking head jump cuts
Premiere Pro v25/v26 setup
- Assemble dialogue first. Open the Text panel and rely on Text-Based Editing to strip out duplicate takes, false starts, and extra pauses. Hold onto usable breaths until picture lock feels settled.
- Set up overlap tracks. Park talking-head video on V1, alternate overlapping dialogue between A1 and A2, and lay matching room tone on A3. That stops two clips from competing for the same audio section.
- Roll audio separate from picture. To create a J cut, pull the incoming audio left under the outgoing shot. To create an L cut, push the outgoing audio right under the incoming shot. When you can, work with real handles.
- Shape the transition. Apply a brief Constant Power fade, shift its midpoint, and dial clip gain before any track compression. Aim to even out the noise floor instead of just raising a quiet word.
- Lock dialogue before finishing captions. Perform transcript and caption fixes inside the Text panel, refine caption styling through the contextual Properties panel, and find branded title options in Graphics Templates.
When a clip lacks a clean handle, avoid stretching a phoneme to the point of smearing. Fill the gap with room tone, relocate the cut to a natural pause, or hide the video change with a relevant cutaway while keeping the audio intelligible.
DaVinci Resolve Studio v19/v20 setup
Start assembly on the Edit page with transcription assistance, then roll video and audio separately. Spread J-cut and L-cut overlaps over two dialogue tracks, the same way you would in Premiere Pro. Lay continuous room tone under the whole section so every join sits on a uniform bed.
Reserve the Fairlight page for joins that require detailed fixes. Set clip gain ahead of compression, adjust the fade shape, and make sure EQ or noise reduction stays consistent between clips. Use Fairlight to rescue a tough join, yet the basic editorial timing ought to play cleanly on the Edit page already.
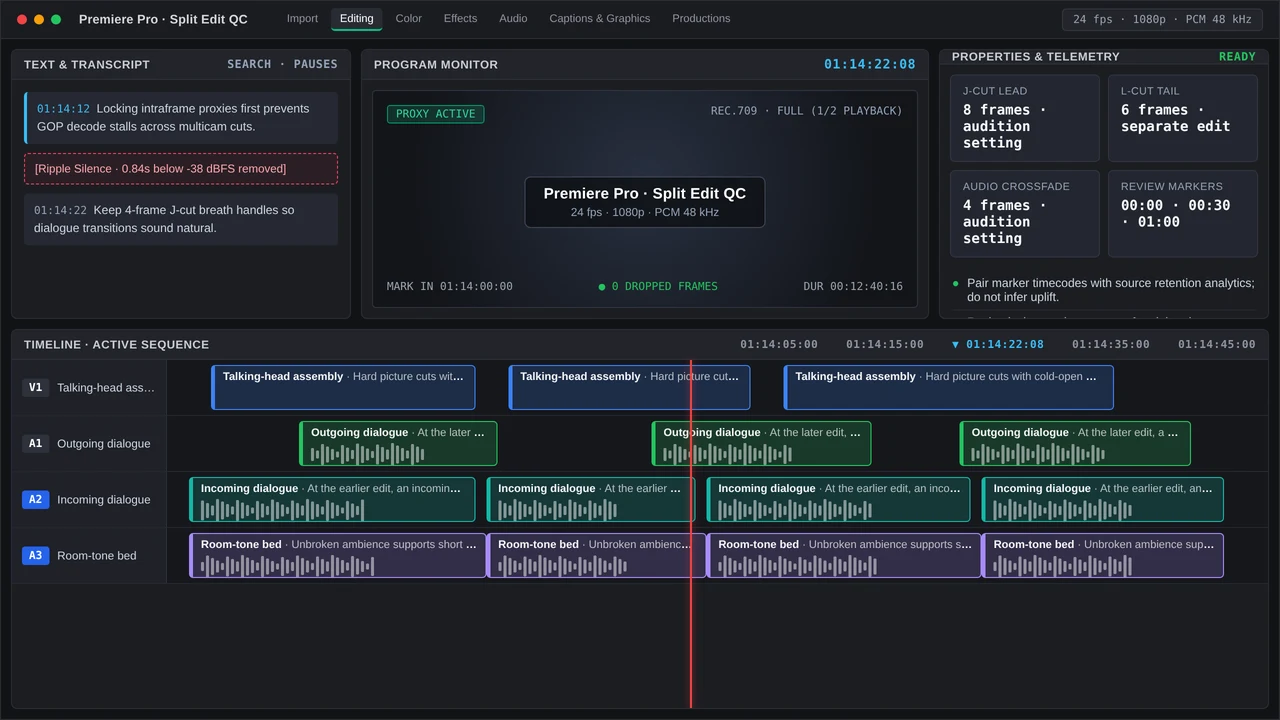
Common timeline bottlenecks and QC checks when handling J cut and L cut audio smoothing for talking head jump cuts
Missing handles create the first bottleneck. Deleting via transcript frequently leaves clips without usable audio past the cut. Go back to the source take rather than layering fades on room tone that does not exist.
Noise reduction creates the second bottleneck. Mismatched processing between neighboring clips often makes the background pump on each jump cut. Keep dialogue processing consistent, and automate only the odd word or breath that stands out.
Semantic pre-laps create the third bottleneck. When a J cut introduces the next sentence prematurely, the speaker seems to interrupt themselves. Nudge the edit so the picture leads with nothing more than air, a breath, or the clean onset of a word.
Run this QC pass before review:
- Audition each join without looking at the picture; flag any clipped consonants, duplicated breaths, clicks, or shifts in background.
- Monitor on headphones and on regular speakers at the same steady level.
- Review the complete mix, since music sometimes hides clicks yet reveals pumping in the noise floor.
- Make sure added room tone did not blur pauses that aid comprehension.
- Watch the opening 30 seconds as an uninterrupted viewer would, then confirm chapter timestamps after any runtime adjustments.
- Log any edits that still sound noticeable with timecode-pinned notes.
Operational space matters for QC time as well. Healthy boutique shops aim for 65% to 75% Promethean Agency Operations Benchmark, 2025 billable editor utilization, reserving the rest for ingest, renders, QC, and maintenance. Productized YouTube editing shops target 55% to 65% Agency Analytics & Post-House Benchmarks, 2025 gross delivery margin per retainer seat before overhead and sales costs.
On the last audio-only pass, play every flagged join starting at the prior sentence and continuing past the next breath. Remove its marker after the sentence, breath rhythm, and room tone feel coherent.
More in RoughCut Club
Fix the 30-second talking-head retention dip with a 70%+ intro target, tighter pause removal, 4-to-8-frame J-cuts, and clean YouTube chapters.
Structure YouTube chapters with 00:00, three timestamps and 10-second minimums; place mid-video pattern resets at real topic turns to protect retention.